Imagine stepping into a time capsule, and unlocking a treasure trove of cherished memories. The moment you lay your eyes on it, a rush of emotions takes hold—nostalgia, excitement, and a hint of adventure…
It's the legendary Super Nintendo Entertainment System (SNES) that we are talking about here, a true icon of gaming history. But not just any SNES. We are talking about the one with a unique tale to tell: the Yellow Super Nintendo!
The Yellow Super Nintendo holds a special place in the hearts of avid gamers who witnessed the golden era of pixelated glory. Its vibrant hue is not a sign of fading beauty, but rather a badge of honor that signifies countless hours spent immersed in unforgettable adventures. It carries the stories of friendships forged, epic quests conquered, and virtual worlds conquered by the sheer power of imagination.
As we journey back to those simpler times, we discover the joy of rediscovery. The Yellow Super Nintendo, once a silent witness to gaming triumphs, has stood the test of time. Neglected and forgotten, the retro console now beckons us, whispering tales of pixelated heroes and hidden treasures, waiting to be uncovered.
In this article, we will embark on a restoration mission—one that will rekindle the magic of an era long gone. Restoring this beloved console isn't merely a technical endeavor; it's a portal to a realm where dreams come true and heroes rise from humble beginnings. By the end of this journey, you'll not only have a fully restored Yellow Super Nintendo but also a piece of your own gaming legacy revived! If you don't have one, get a top-quality SNES console at Retro Gaming Stores.
Join us as we venture into the heart of this captivating restoration process, one in which innovation merges with nostalgia and ancient memories fuse with modern techniques.
So, prepare yourselves for a transformative experience, the one where the past meets the present and the exhilaration of gaming takes on a whole new meaning. Get ready to revive your Yellow Super Nintendo and awaken the dormant hero within you. Now, without further ado, let’s discuss the ways to restore a Yellow Super Nintendo.
About Super Nintendo Console
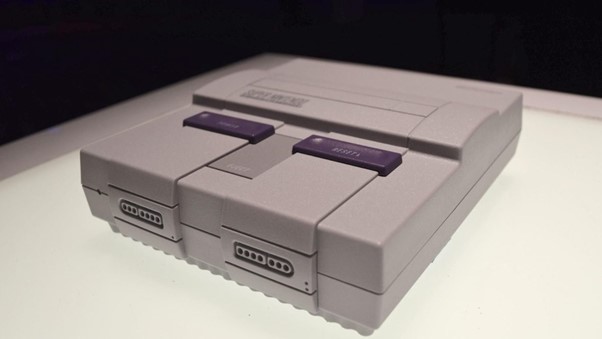
But before we get into the SNES restoration process, let’s take a moment to appreciate the amazing console that is the Super Nintendo. This console was not just a simple upgrade from the previous Nintendo Entertainment System (NES), but a whole new level of gaming experience that introduced many innovations and features that are still relevant today.
This iconic console, born from the creative minds at Nintendo, revolutionized the gaming landscape when it first graced our living rooms in the early '90s. With its sleek design and innovative capabilities, it became the gateway to extraordinary adventures and unforgettable experiences.
The SNES introduced us to a new era of gaming, where Mario leaped to new heights, Zelda embarked on epic quests, and countless other legendary characters made their mark. It was a time when gaming evolved from novelty to an art form, captivating both the casual player and the most dedicated of enthusiasts.
But what set the SNES apart from its predecessors was its impressive 16-bit processor which delivered graphics and sound that pushed the boundaries of imagination at the time. It boasted a vast library of games, each with its own unique world to explore and challenges to conquer. From side-scrolling platformers to thrilling RPGs and fast-paced action adventures, the SNES had something for everyone.
One of the SNES's crowning achievements was the introduction of Mode 7 graphics—a groundbreaking technology that allowed for scaling, rotation, and pseudo-3D effects. This innovation brought a new level of immersion, giving gamers a taste of three-dimensional magic on their screens. Who could forget the thrill of piloting an F-Zero hovercraft, weaving through futuristic tracks with stunning speed and precision?!
The SNES also gave birth to iconic franchises that would shape the gaming landscape for years to come. Super Mario World, The Legend of Zelda: A Link to the Past, Super Metroid, and Chrono Trigger are just a few of the masterpieces that etched their names into the annals of gaming history. These games, along with a plethora of others, showcased the SNES's ability to transport players to imaginative worlds brimming with charm, challenge, and boundless creativity.
The Super Nintendo Console became a symbol of shared experiences, bringing friends and family together in front of the TV screen. It laid the foundation for gaming communities, fostering fierce rivalries and unforgettable moments of triumph. The console's legacy lives on, carried by those who fondly reminisce about the hours spent conquering virtual realms and creating memories that would last a lifetime.
Now that you are armed with a deeper understanding of the SNES's significance, we're ready to embark on our restoration journey. Together, we will breathe a new life into your Yellow Super Nintendo, reigniting the magic of an era that continues to captivate our hearts.
So, brace yourself for the next section—where technical prowess meets nostalgic passion, and the SNES's legacy shines brighter than ever before.
Ways to Restore a Yellow Super Nintendo
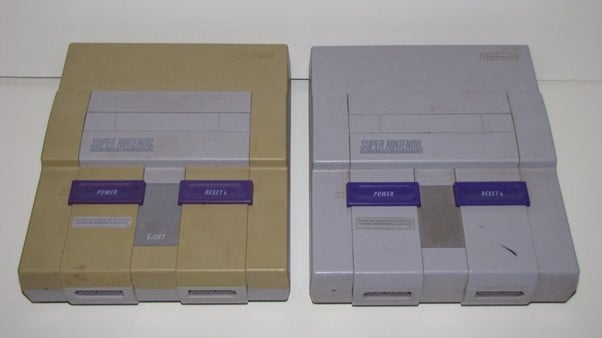
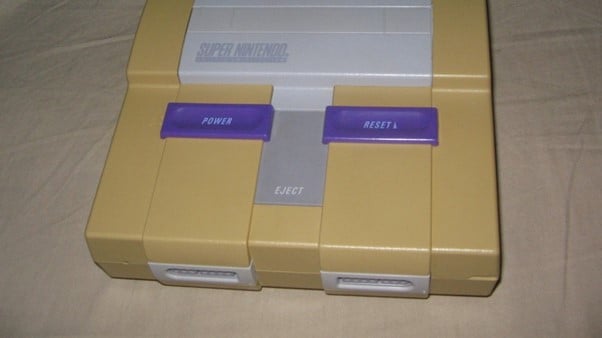
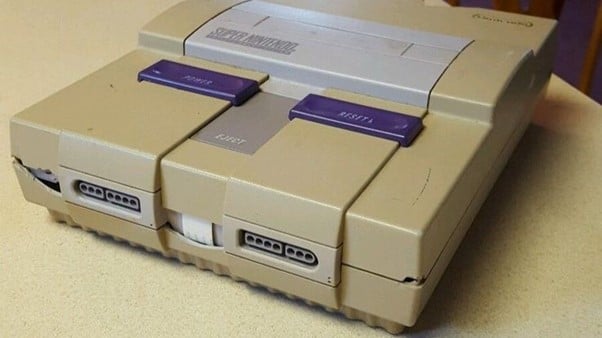
Now that you know a bit more about the Super Nintendo console, you might be wondering why it turns yellow in the first place. The answer is simple: OXIDATION. The plastic used in the SNES contains a chemical called bromine, which is a flame retardant that prevents the console from catching fire. However, bromine also reacts with UV radiation, which is present in sunlight and some artificial lights. This reaction causes the bromine to change color from clear to brown, and this color seeps into the plastic, making it look yellow or brown.
This process happens gradually over time, and it affects different parts of the console differently. Some parts may turn yellow faster than others, depending on how much bromine they contain and how much UV radiation they are exposed to. The yellowing does not affect the performance of the console, but it does make it look old and dirty.
Fortunately, there are ways to reverse the yellowing and restore your SNES to its original gray color. Here are some of the most common methods that people use:
· Bleaching: This method involves using a strong bleach solution, such as hydrogen peroxide or oxalic acid, to remove the yellow color from the plastic. You will need to disassemble your SNES and soak the plastic parts in the bleach solution for several hours, preferably under sunlight or UV light. Then you will need to rinse them thoroughly and let them dry. This method can be effective, but it also has some risks. Bleach can damage or weaken the plastic, making it more brittle or prone to cracking. Bleach can also cause skin irritation or eye damage if not handled properly.
· Polishing: This method involves using a fine abrasive material, such as sandpaper or steel wool, to scrape off the yellow layer of plastic. You will need to disassemble your SNES and rub the plastic parts with the abrasive material until they are smooth and gray. Then you will need to clean them with a cloth and some alcohol. This method can also be effective, but it also has some drawbacks. Polishing can remove too much plastic, making the parts thinner or uneven. Polishing can also scratch or damage the logos or labels on the plastic.
· Painting: This method involves using spray paint or a brush to cover the yellow parts with a new layer of gray paint. You will need to disassemble your SNES and mask off any areas that you don’t want to paint, such as the buttons or ports. Then you will need to apply several thin coats of paint, letting them dry between each coat. This method can be easy and cheap, but it also has some limitations. Painting can make your SNES look unnatural or fake, especially if you don’t match the original color or texture of the plastic. Painting can also chip or peel off over time, exposing the yellow parts again.
· Retrobright Method: The Retrobright method involves using a homemade or commercially available retrobright solution to remove the yellowing. This typically consists of a mixture of hydrogen peroxide, a thickening agent, and sometimes an ultraviolet (UV) light source. The console's plastic casing is carefully coated with the retro bright solution, which is then exposed to UV light for a specific duration. This method aims to reverse the chemical reaction that caused the yellowing, restoring the console's original color.
· Hydrogen Peroxide Bath: Another method involves immersing the disassembled SNES plastic components in a hydrogen peroxide bath. The parts are soaked in a mixture of hydrogen peroxide and water, often with the addition of a stabilizer to control the strength of the solution. Over time, the peroxide works to break down the yellowed substances and restore the original color. This method requires careful handling and may take longer compared to other approaches.
However, without ever indulging in the complexities of any above methods, you can simply replace your Yellow Super Nintendo’s housing shell. This is the safest option of all and requires the minimum of technical expertise. All the while, it caters to an awesome DIY experience!
· Replacing SNES Housing Shell: This ultimate method of restoring a Yellow Super Nintendo method involves buying a new housing shell for your SNES that is already gray and not yellowed. However, you will need to disassemble your SNES and transfer all the internal components from your old shell to your new shell. Then you will need to reassemble your SNES with your new shell. This method can be simple and effective, but it also has some challenges. Finding a new housing shell that fits your SNES model and region can be difficult or expensive.
Super Nintendo Replacement Housing Shell
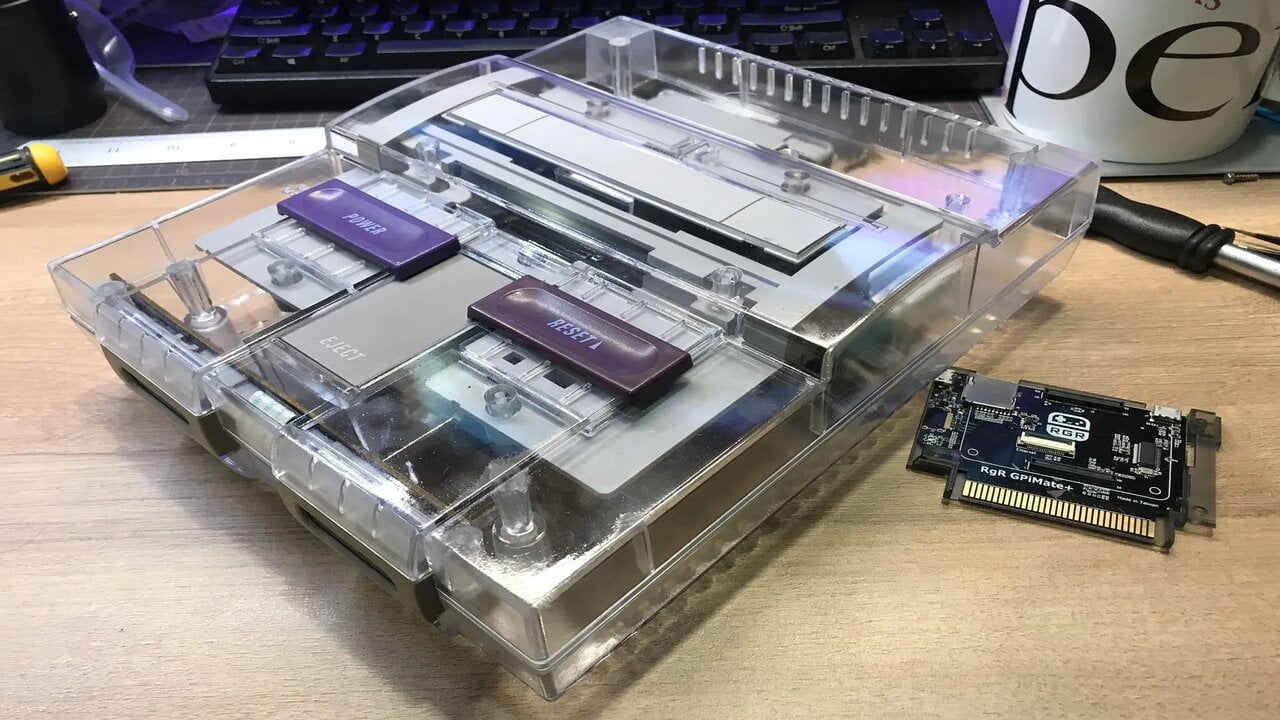
So, if you have now decided to restore your Yellow Super Nintendo then look no further than the transparent variant of the Super Nintendo Replacement Housing Shell—an absolute game-changer in the world of console restoration!
Being a more straightforward approach, the replacement housing shell offers a comprehensive solution that guarantees a pristine, non-yellowed Super Nintendo, effortlessly recapturing the console's original charm.
The Super Nintendo Replacement Housing Shell is the ultimate choice as it leaves you with a permanent solution that you don’t have to repeat time on time. Here are a couple more additional benefits to restoring your Yellow Super Nintendo with an SNES housing shell:
· Flawless Aesthetics: The replacement housing shell provides an immaculate canvas for your SNES. Crafted with precision and attention to detail, it replicates the original design flawlessly, offering a fresh, vibrant appearance reminiscent of its glory days. So, you can bid farewell to the discolored plastic and embrace the beauty of a console that looks as if it just emerged from the factory.
· Ease of Installation: Restoring a yellowed Super Nintendo can sometimes be a complex and time-consuming endeavor. However, the replacement housing shell simplifies the process significantly. Designed to fit the SNES seamlessly, it ensures a hassle-free installation experience. With a comprehensive guide and basic tools, you'll have your console disassembled, transferred into the new shell, and reassembled in no time.
· Durable and Reliable: The replacement housing shell is constructed using high-quality materials, built to withstand the test of time. The sturdy plastic ensures long-lasting durability, providing a solid foundation for your gaming adventures. Rest assured that your restored Super Nintendo will continue to serve you faithfully, preserving the nostalgia for years to come.
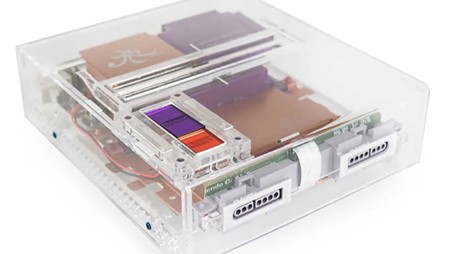
Now that you understand the advantages of the Super Nintendo Replacement Housing Shell, you may be wondering where to obtain this essential component. This is because finding the right one takes a lot of time since many sellers try to sell low-grade replacement SNES housing shells.
However, you can get one Retro Gaming Stores, a trusted destination for retro enthusiasts seeking quality restoration products. At Retro Gaming Stores, you will find a wide selection of replacement housing shells, including the clear variant that adds a touch of modern elegance to your console.
The process of acquiring and installing the replacement housing shell from Retro Gaming Stores is straightforward. Simply visit their website, select the desired shell variant, and proceed with the purchase. Once your package arrives, follow the detailed instructions provided to ensure a seamless installation. With their commitment to customer satisfaction and the excellent quality of their products, Retro Gaming Stores is a reliable partner in your Super Nintendo restoration journey.
Embrace the opportunity to revitalize your beloved Super Nintendo console and relive the magic of gaming's golden era. As such, the Super Nintendo Replacement Housing Shell is the ultimate solution, offering an unparalleled restoration experience that reignites nostalgia and breathes new life into your treasured SNES.
Visit Retro Gaming Stores today and embark on a restoration adventure like no other. Let the iconic retro console transformation begin!
Final Thoughts
As seen above, your old SNES console can be revived back into its original glory. All you need is to buy a replacement shell and put it on your console. What do you think about the methods for restoring a Yellow Super Nintendo? Which is your favorite one? Share your thoughts with us and let us know in the comments below!




.jpeg)


 (1).jpg)
.jpg)

.jpg)


